There are a wide variety of photographic processes, and as a result, the response time to salvage wet photographs will vary according to the type of photograph. Some photographic processes can withstand immersion in water for a day or more, whereas others will be permanently disfigured or even destroyed by a few minutes. In general, wet photographs should be air dried or frozen as quickly as possible. Once they are stabilized by either of these methods, there is time to decide what course of action to take.
Ideally, salvage should occur under the supervision of a conservator. The guidance of a professional can minimize damage to a collection, especially if treatment can commence immediately after the damage has occurred. Time is of the essence: the longer the period of time between the emergency and salvage, the greater the amount of permanent damage that will occur.
personal health and safety
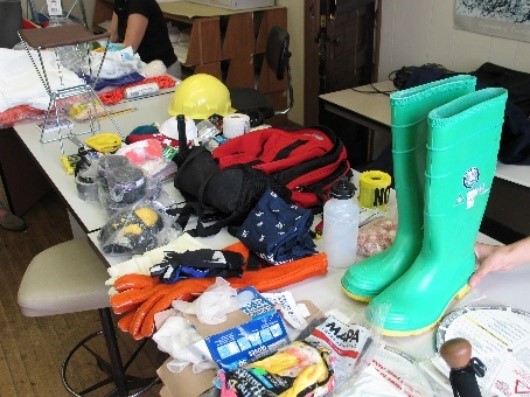
 Depending on the nature of the water disaster, building structures may be compromised, water may be contaminated with biological or chemical toxins, and mold growth may have already begun. Any of these conditions could pose significant health risks, so it is important to wear appropriate personal protective equipment (PPE) such as boots, gloves, hard hat, face mask, and/or professionally-fitted respirator as appropriate. If standing water is present, turn off electricity to make sure there is no risk of electrocution. Verify that the area is safe to enter. Stay calm and do not work alone. Be sure to take digital photographs of the damage before and during salvage and make notes of where collections are moved.
handling Wet Photographs
Fully support paper-based materials from the back with two hands or an auxiliary stiff support. This is especially important with oversized and fragile materials.
Do not touch the emulsion or allow the emulsion to come in contact with any other materials as it dries.
minimize immersion time
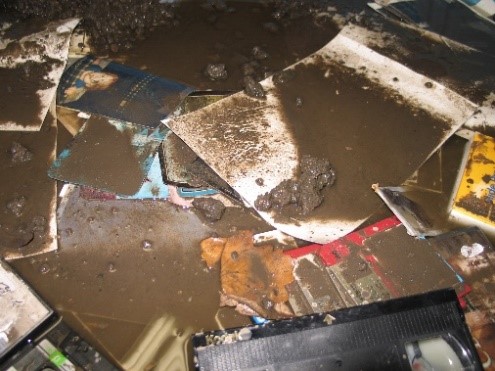
 While some photographic materials can survive water immersion for 48 hours or more (see “Salvage” below), other photographs in water will quickly deteriorate: images can separate from mounts, emulsions can dissolve or stick together, inks can bleed, and staining can occur.
Mold can grow within 48 hours at 60% relative humidity and 70°F, and it often causes permanent staining, weakening or loss of emulsion, and other damage to photographs. For these reasons, photographs need to be dried as quickly as possible. If photographs cannot be dried, they should be frozen.
salvage priorities for wet photographs
In general, color materials should be recovered before black and white prints (paper-based materials), which should be salvaged before films (plastic-based materials). Important exceptions include deteriorated nitrate and safety films, which are extremely susceptible to water damage.
Remember, some photographic materials (such as salted paper, albumen, platinum, cyanotype, and most photomechanical processes) can survive water immersion for 48 hours or more.
Photographs made by the following processes should be salvaged first: ambrotypes, tintypes, collodion wet plate negatives, gelatin dry plate negatives, lantern slides, deteriorated nitrate or safety film, autochromes, carbon prints, Woodburytypes, deteriorated or unhardened gelatin prints, inkjet prints, and color materials. Photographs made by many of these processes may not survive immersion. See NEDCC Preservation Leaflets 5.2.1, 5.2.2, and 5.2.3 “Types of Photographs” or the Graphics Atlas for assistance in identifying photographic processes.
Prioritize photographs that are unique. If you have access to the original undamaged negative or a digital file of an image, or if you can get a reprint from the artist/originator, it may not be the best use of resources to save the damaged photographs.
removing photographs from enclosures
Paper or plastic sleeves and envelopes: Do not attempt to slide the photograph out. Trim the edges of the enclosure on at least three sides and carefully pull the plastic or paper back at an acute angle. If there is any resistance, stop removal and leave the enclosure in place.
Plastic pocket albums – Follow the procedures for removing plastic sleeves above.
Albums – “magnetic” or self-adhesive: Follow the procedures for removing plastic sleeves above. Remove photos from pages if they release easily, otherwise leave them on the pages. Removal of strongly adhered photographs from the pages presents a high risk of damage and should be performed by a conservator.
Albums – attached with adhesive or photo corners: If photos are loose or easily removed, take them out of the album to air dry. Removal of strongly adhered photographs from the pages presents a high risk of damage and should be performed by a conservator. If album pages are annotated, you may wish to follow procedures for drying books in order to preserve that information. (See NEDCC Preservation Leaflet 3.6 “Emergency Salvage of Wet Books and Records.”) If no information is written on the pages, it may be best to destroy the pages in order to save the photographs. If the album is very wet it may need to be bagged and frozen until a conservator can treat it (see “Freezing” below).
Frames: Examine the glazing to determine if any areas of the emulsion appear to be adhered.
- If nothing is attached to the glazing, remove the object from the frame and lay it face up to dry.
- If the object is attached to the glazing, remove the object and the glazing from the frame together. Bag and freeze the photograph and glazing for future consultation with a conservator. Removing the photograph from the glass could cause damage; however, it is possible to digitally image the photograph through the glass.
Components of frames may swell if exposed to direct moisture, and it may be necessary to damage the frame to save the object. Any damaged housing material should be bagged and discarded. Remember to take images of the damaged materials.
air drying photographs
 If personnel, space, and time are available, photographs should be air dried. If photographs cannot be dried, they should be frozen.
- Separate photographs from their enclosures, frames, and from each other, as described above. If they are stuck together or adhered to glass, they should be bagged while still damp and frozen. It will be necessary to consult with a conservator to see if separation is possible.
- If the photographs are visibly dirty and the emulsion is intact, they may be rinsed in a tray of clean water. (Skip this step if it is unnecessary or if resources are not available.)
- Allow excess water to drain off the photographs.
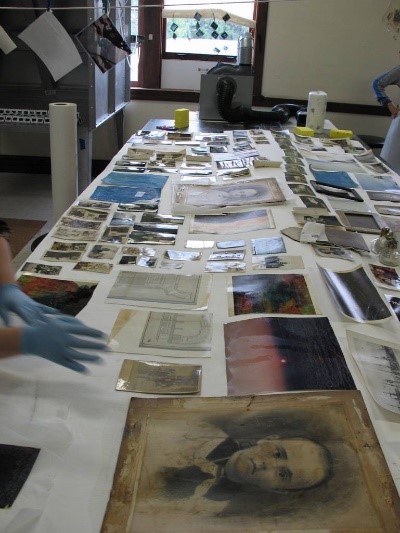
- Spread the photographs out to dry, face up, laying them flat on an absorbent material such as blotters, unprinted newsprint, paper towels, or a clean cloth.
- Shelves for drying can be made by placing layers of corrugated board spaced with disposable plastic cups (or similar objects). Ideally you should have 4 or more inches of space above the photographs before adding the next board.
- Keep the air around the drying materials moving at all times (for example, by using fans) as this will speed up the drying process and minimize the risk of mold growth.
- Photographs may curl during drying. They can be flattened later under guidance from a conservator.
- Dried photographs are reasonably stable. Store them until you can talk to a conservator who has experience with photographs and can advise you of treatment needs.
freezing photographs and albums
If immediate air drying of photographs is not possible or if photographs are stuck together, freeze them. First, interleave or wrap individual photographs or small groups of photographs with a non-woven polyester material or waxed paper. This will make them easier to separate when they are eventually treated. Then, place stacks of photographs in a sealed plastic bag with identifying information written on it.
If a photograph album is very wet, it may need to be bagged and frozen until a conservator can treat it. Before freezing, interleave wax paper or non-woven polyester where photographs are placed on facing pages.
Frozen photographs are reasonably stable. Store them until you can talk to a conservator who has experience with photographs and can advise you of treatment needs.
salvaging negatives and slides
Negatives should be dried vertically. They can be hung on a line with plastic clips placed at the edges. As described above for photographs, keep the air around the drying materials moving at all times.
Slides can be rinsed and then air dried; preferably they should be hung on a line or propped on edge.
Ideally, slides should be removed from their frames for drying and then remounted. In some instances, it may not be possible to save the frames.
Slides mounted between glass must be removed from the glass or they will not dry.
drying frozen photographs
Frozen photographs can be dried by thawing, followed by air drying. As a stack of photographs thaws, individual photographs can be carefully peeled from the group and placed face up on a clean, absorbent surface to air dry. The stacks can also be immersed in clean water to facilitate removal and delamination; however, this step is best performed by a trained conservator.
Vacuum thermal drying, where the frozen material is thawed and dried in a vacuum, is not recommended for photographs. Gelatin photographs undergoing this procedure tend to mottle severely and stick together.
Photographs can be vacuum freeze dried; in this process no thawing occurs. Gelatin photographs may mottle during the procedure, but they will not stick together.
Wet collodion process on a rigid support (glass plate negatives, ambrotypes, lantern slides, and tintypes) must never be freeze dried; they will not survive.
resources
Find a Professional. The American Institute for Conservation (AIC) provides an online database of conservators that can help you locate an established conservator in your area: https://www.culturalheritage.org/membership/find-a-conservator.
Graphics Atlas is an online resource for the identification and characterization of prints and photographs. http://www.graphicsatlas.org/
National Heritage Responders is a highly skilled team of conservators and other collections care professionals with expertise in emergency response; call 1-202-661-8068. NHR members are available to provide advice to individuals as well as advice and on-site response to institutions. (NHR members do not normally provide on-site assistance to individuals, although it may be possible to do so in conjunction with other collections in an affected region.) All assistance provided by the NHR is free. Less urgent questions can also be answered by emailing [email protected].
NEDCC Collections Emergency Hotline provides 24/7 phone disaster assistance for institutions or individuals with damaged photographic materials; call 1-855-245-8303. General questions about photographs can be directed to Ask NEDCC at (978) 470-1010 or [email protected].
University of Delaware Art Conservation: How to Restore Flood-damaged Photos, on the University of Delaware YouTube channel.
NEDCC Preservation Leaflets
3.6 “Emergency Salvage of Wet Books and Records”
5.2.1 “Types of Photographs, part 1: 19th and Early 20th Century”
5.2.2 “Types of Photographs, part 2: Color”
5.2.3 “Types of Photographs, part 3: Digital Output Media”
ACKNOWLEDGEMENTS
All images from Campbell Center Course taught by Gary Albright. The Campbell Center is now known as the International Preservation Studies Center.
Written by Gary Albright 1999, revised by Amanda Maloney 2019 and Ann Marie Willer 2020
Attribution-NonCommercial-NoDerivs
CC BY-NC-ND
